Start with a clear, front-facing view and compare your forehead, cheekbones, jaw, and overall face length. Treat the closest shape as a description, not a verdict. If two labels seem plausible, keep both and use the features you can actually see.
By the end, you can make a short observation card: what looks widest, what the lower contour looks like, and which landmarks are covered. Your preferred hairstyle, frame fit, and daily routine are separate inputs that a photo cannot supply.
Set Up a Useful View
Use one front-facing view in which you can see the forehead, cheekbone area, and chin. Move hair away from the outline if you can. This is a practical way to compare visible landmarks, not a test that produces an exact face-shape result. The face shape analyzer homepage offers the current guide collection; photo analysis is not available in this preview.
Close-range portraits can show perspective distortion. Before comparing images, check camera distance, head tilt, expression, lighting, and sharpness. If those conditions differ noticeably, set the comparison aside and use a more consistent view. That checklist helps you organize observations; it does not calibrate a camera.
When to Retake the Photo
If the edges are blurry or the hairline is covered, take another photo if you want a clearer comparison. Do not fill in a hidden contour from a guess.
Compare Four Visible Landmarks
Work in this order: visible length from hairline to chin, forehead width, width at the cheekbones, then the jaw. At each step, write a relative observation such as “longer than it looks wide” or “cheekbones appear widest.” You do not need a universal ratio or a millimeter measurement.
For example: “Widest at the cheekbones; narrower at the jaw; hairline partly hidden.” The first two phrases describe what the photo appears to show. The last records a limit. It does not establish the forehead width or a final shape label.
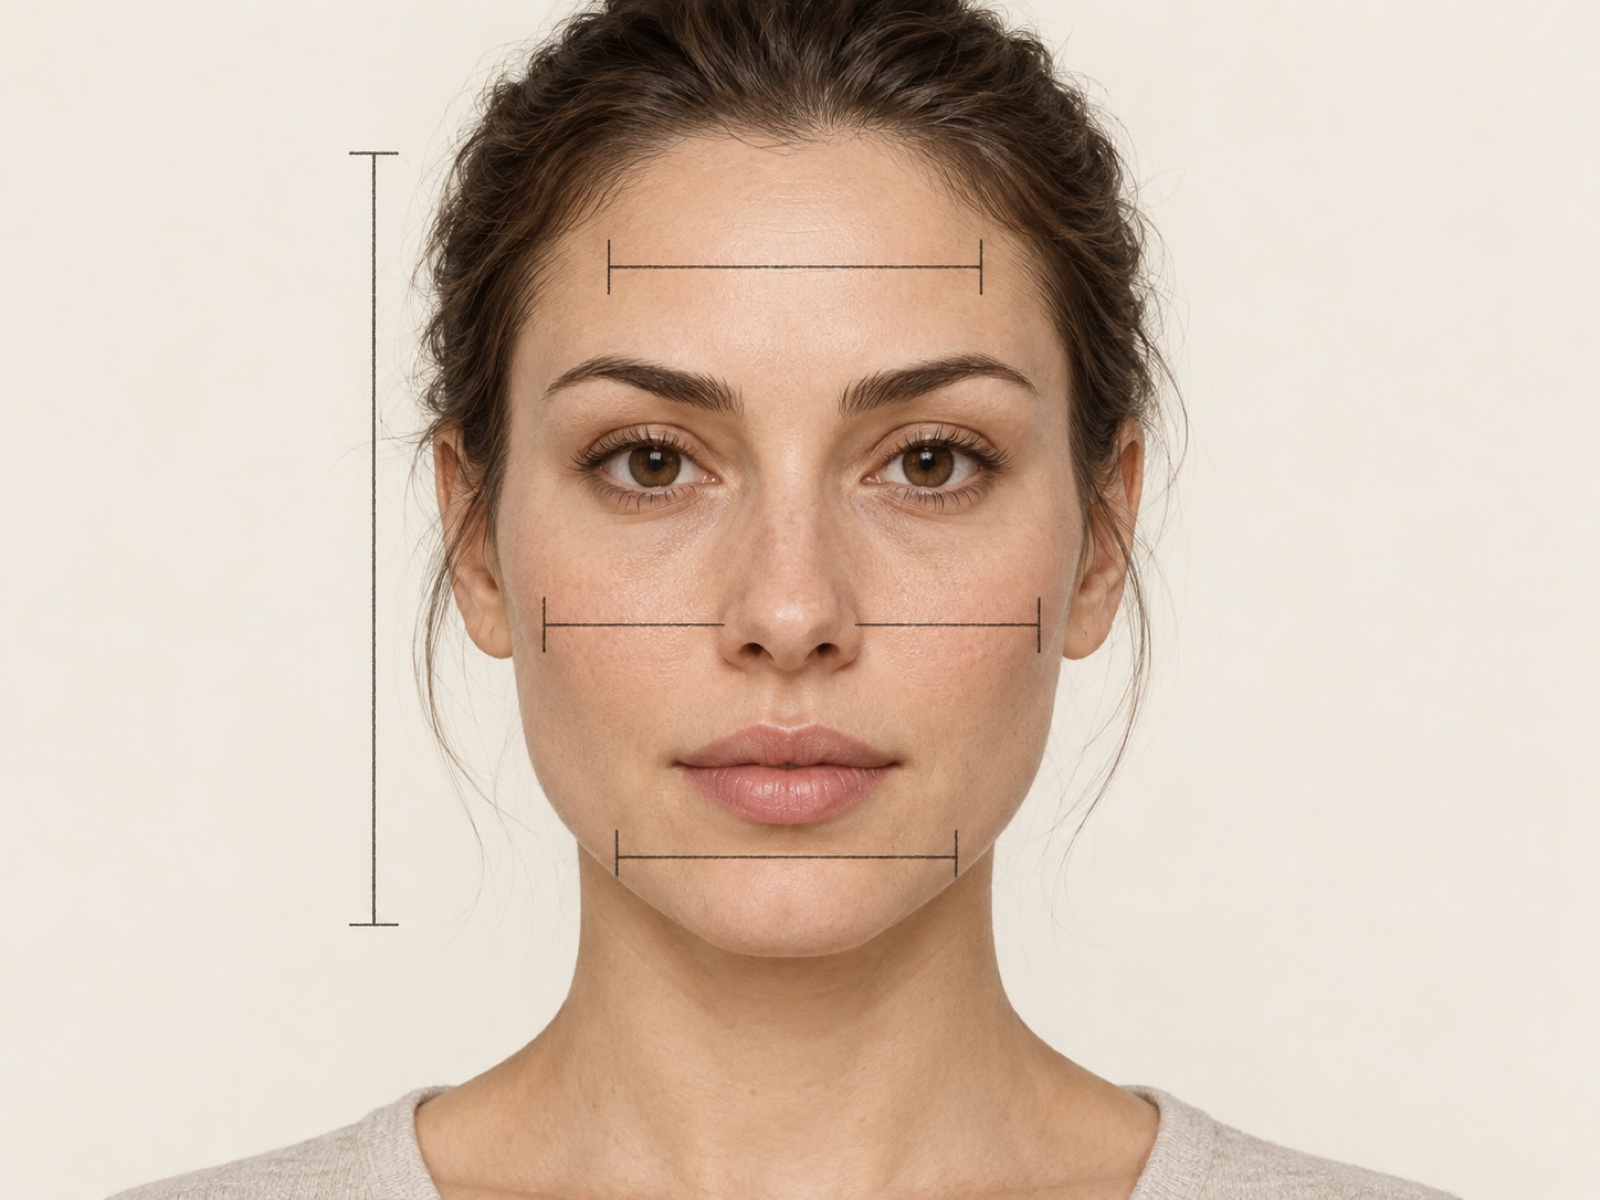
The temples sit near the upper side of the face, while the cheekbone area gives you a separate width reference lower down. Hair volume near the temples is not cheekbone width. Use the chin as the lower endpoint for visible length; the illustration does not set a numeric threshold.
Keep Measurements in the Same View
If you compare widths on a screen, use the same image for every landmark. Do not combine a width from a selfie with a length from a mirror view. Screen pixels help compare areas within that view; they are not real-world millimeters.
Use Shape Names as Descriptions
Round, square, oval, oblong, heart, and diamond are a styling vocabulary for common visible patterns. The table gives you a starting description and a reason to look again, not a rule for assigning one permanent label.
| Description | Visible width pattern | Lower contour | Check again |
|---|---|---|---|
| Round | Length and width may appear closer together | Softer, curved line | Is the hair changing the outer width? |
| Square | Forehead, cheek area, and jaw may look relatively similar in width | More visible jaw angles | Is the head turned? |
| Oval | Length appears greater than width; areas may taper gently | Rounded or softly tapered line | Is the hairline fully visible? |
| Oblong | Length appears more prominent than width | May be soft or angular | Is camera perspective changing the impression? |
| Heart | Upper face may appear wider than the lower face | Narrower toward the chin | Is a fringe covering the forehead? |
| Diamond | Cheekbone area may appear wider than forehead and jaw | Narrows toward the chin | Are you comparing cheekbones with hair at the temples? |
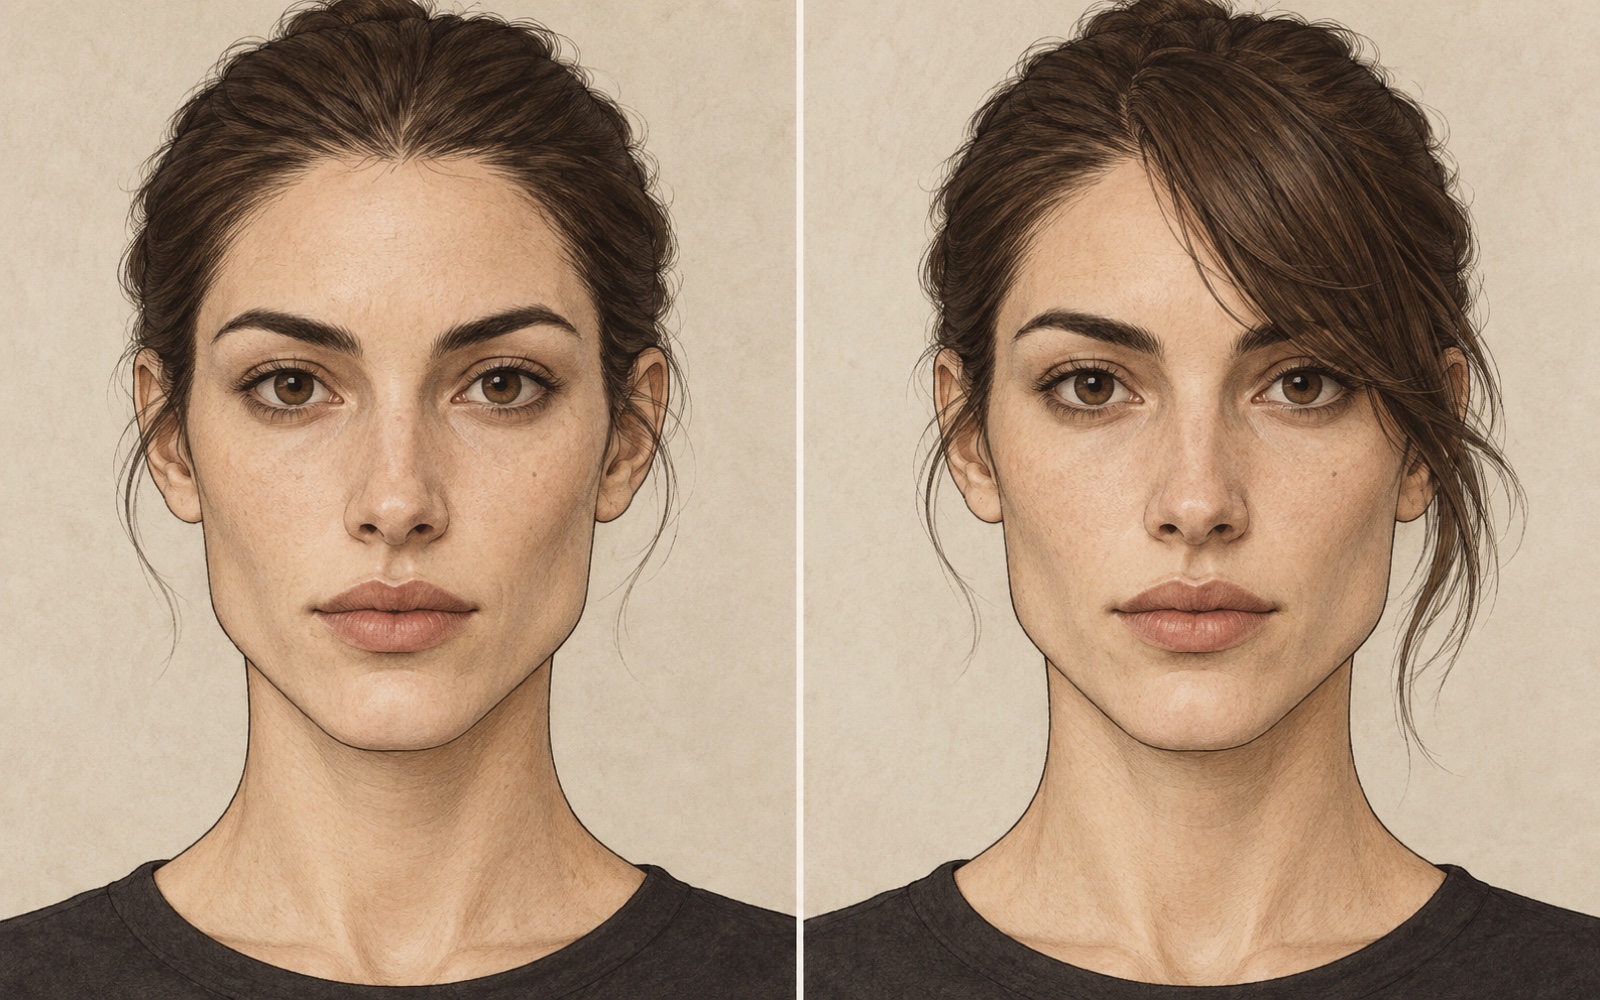
Your hairstyle has its own outline. A wide side part or volume at the temples can change the full silhouette without changing the face landmarks you are trying to describe. Use the same visible reference areas across the table.
Read the Contour, Not the Hair
In the illustration above, the cheekbone guide crosses the face itself. If a style adds volume farther out at the sides, that volume belongs to the hairstyle, not the cheekbone measurement. Likewise, describe the jaw contour from the lower face rather than from hair resting beside it.
What If Two Shapes Seem to Fit?
An elongated outline with an angular jaw may sound both oblong and square. That is not an error. Write “longer visible outline” and “angular lower contour,” then keep both labels as tentative shorthand if they help.
To make a styling choice, compare one feature at a time: where a haircut places its strongest line, or where its side volume sits. You can choose a repeated line or a contrasting one according to your taste. There is no need to settle the label first.
Use an Observation Card
Keep four kinds of information apart:
| Observed | Possible interpretation | Not visible | Preference |
|---|---|---|---|
| Cheekbone area appears wider than the jaw; lower contour looks angular. | Diamond-like width pattern with a square-like jaw detail. | Part of the hairline is covered. | Wants to compare a soft side fringe with an open forehead. |
Choose Your Next Step
For a haircut, take your contour notes and your preferred length into a hairstyle comparison. For glasses, compare frame lines and try the frames on: a face-shape description cannot tell you how a pair will fit or feel. Keep the same observation card as you compare either choice.
Before you move on, check that you have a usable view, a few landmark observations, any covered areas, and the decision you actually want to make. Those notes are enough to make a later guide or an in-person conversation more specific.
A Shape Label Is Optional
You can compare hairstyles without a final classification. “I want to keep this length and see how side volume changes the outline” is a useful request on its own. The value of this guide is a clearer description of what you see and prefer, not a certificate of face shape.
Questions About Identifying Face Shape
Can I have more than one face shape?
Yes. Keep two possible descriptions and note which visible landmarks support each one. You can use the shared features even if neither label covers everything.
Do I need an exact ratio?
No. This guide uses relative visible comparisons and does not set a universal numerical cutoff for any shape.
Why do my photos look different?
Camera distance, head angle, expression, lighting, hair placement, and image clarity can change the visible outline. Compare photo conditions before treating a different impression as a change in your face.
Compare your two options: return to the shape descriptions with your observation card and note which visible feature matters to each option.